
Workflow Settings
Every workflow has a Settings tab that controls how contacts enter the workflow and how the workflow sends messages.
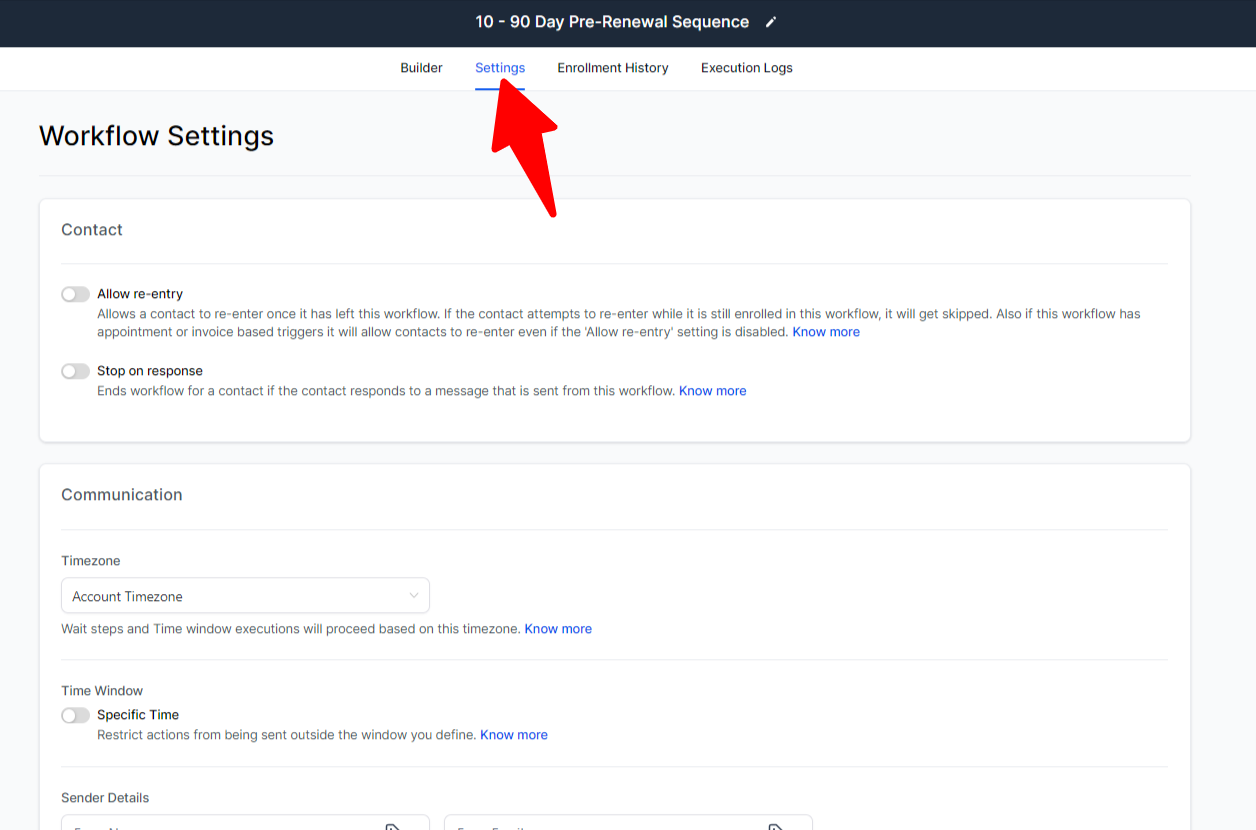
Contact settings
Contact settings control whether someone can enter the workflow more than once and whether a reply stops the sequence.
Allow re-entry
Allow re-entry decides whether a contact can go through the workflow more than once.
When Allow re-entry is off (grayed out), a contact can enter the workflow only once. Use this for one-time sequences such as new-member onboarding that should not repeat.
When Allow re-entry is on (blue), a contact can enter the workflow more than once. Use this when the same person might trigger the workflow again, such as filling out a contact form more than once.
Re-entry happens automatically for invoice or appointment-based triggers when allowed.
You can turn Allow re-entry on temporarily for testing, then turn it off again when testing is done.
Stop on response
Stop on response ends the workflow as soon as the lead replies. Use this for nurture sequences when you do not want the remaining steps to keep sending after someone responds.
Communication settings
Communication settings control timezone, send windows, default sender details, and whether automated messages are marked as read. Most of the time you can leave these as they are.
Timezone: Use the account timezone or the contact timezone.
Specific time: Restrict communication to a window you define, such as business hours only.
Sender details: Set a default sending email address and name. Individual email actions in the workflow can override these defaults.
Mark as read: Control whether automated messages are automatically marked as read in the conversation.
Global Workflow Settings
Global Workflow Settings applies to all workflows and holds Auto Save, error notification, and pause controls. Open it from Automations > Global Workflow Settings, or from Automation inside Settings.
Error notifications
Error notifications email you when a covered workflow action fails. Notifications are off by default; turn them on and manage recipients in Workflow Settings.
Open Workflow Settings and configure email notifications.
Add or remove email recipients.
Toggle notifications on with the switch in Workflow Settings.
Notifications are sent immediately when a covered error occurs. Only one email goes out every 24 hours; after that window, another email is sent if new errors are detected. The email's Review it button opens the Needs Review tab on the workflows list.
Covered actions include Webhook and Custom Webhook, Slack, Array, Custom Code, ChatGPT, Google Sheets, Facebook (Add to custom audience, Remove from custom audience, Conversion API, Messenger, Interactive Messenger), and Instagram (Instagram DM, Interactive Messenger).
Pause workflows on certain dates
Pause one, several, or all published workflows for date ranges, with optional annual repeats. Only published workflows appear in the selector.
Open Global Workflow Settings.
Find Pause Workflow.
In Start Date and Time, select the beginning and end of the pause period, then click Confirm.
In Select Workflows, choose one, multiple, or All Published Workflows.
Click Add Date to add another date-range row, select Annually on a row to repeat the same dates every year, and use the row's Clone icon to duplicate a range or the delete icon to remove it.
You can configure up to 15 date ranges, a range cannot span more than 15 days, and a workflow cannot sit in overlapping ranges. A paused workflow shows Paused on the workflow list, and the builder shows the pause dates with a link back to Global Workflow Settings.
Pausing does not stop enrollment: contacts still enter the workflow while it is paused, then pause at the trigger or at later actions. Contacts continue through Wait and If/Else actions before pausing at a later action, and the workflow resumes automatically when the pause ends.