
Open the group, go to Group Settings > Details > Discovery, edit the slug, and save the change.
Creating a Group
The JourneyCARE Portal feature includes a feature which allows you to create public or private spaces where members can join groups, participate in discussions, access learning content, attend events, and earn rewards.
Navigate there by going to Portal and Groups (left nav) --> Communities (top nav).
Create a group
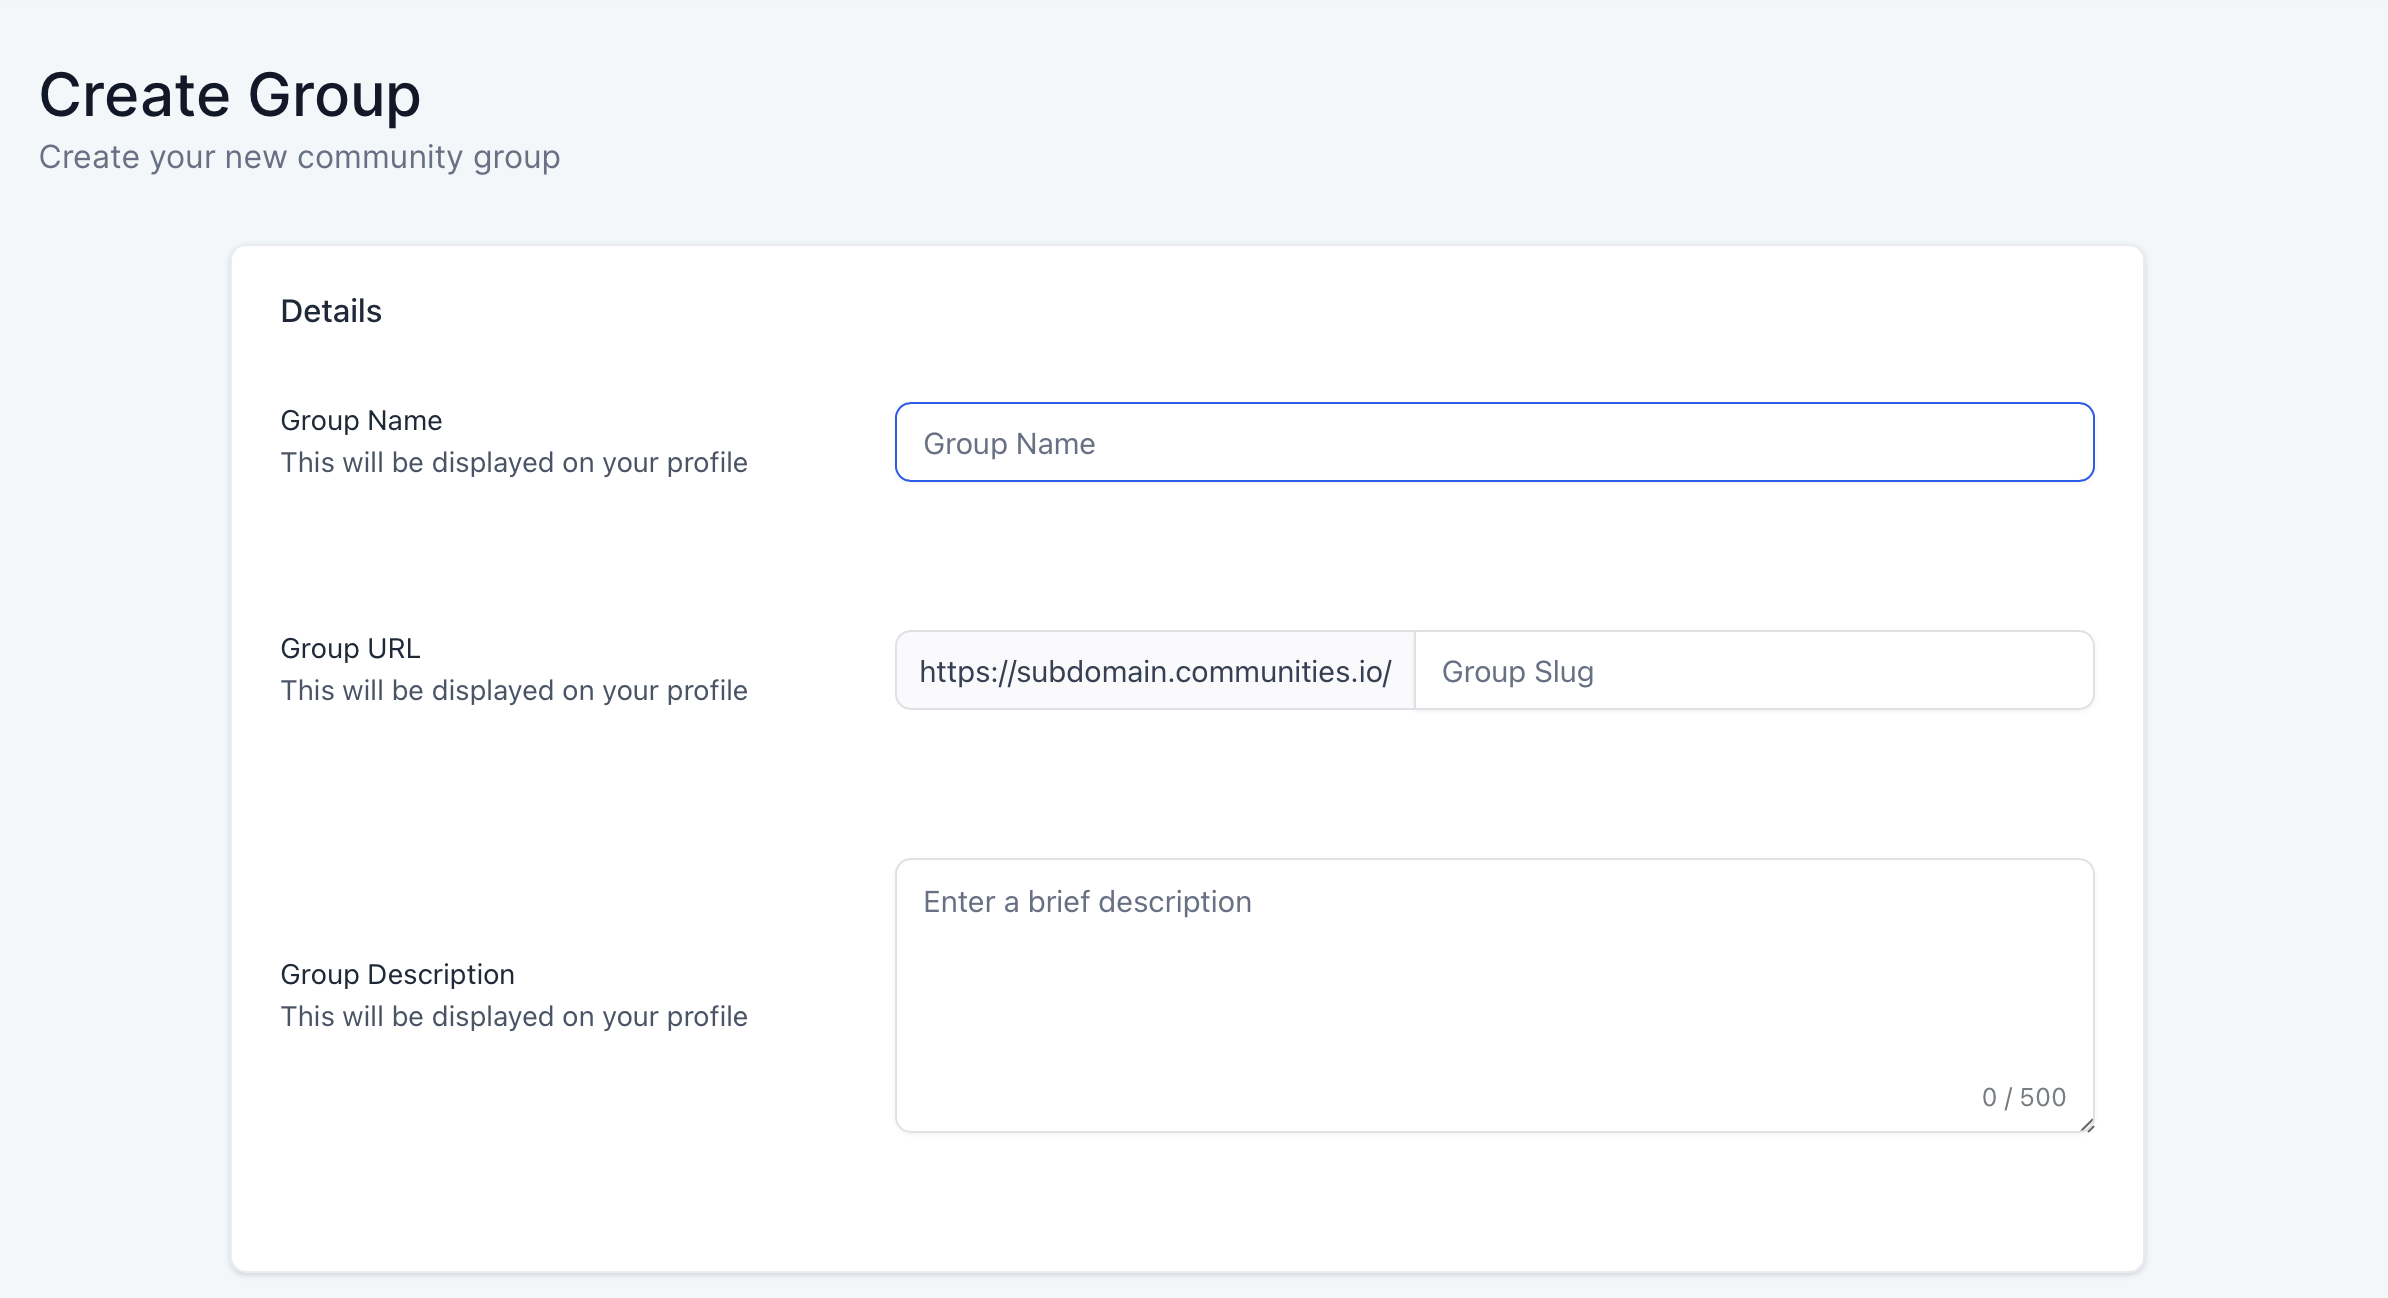
Open Communities and select Create Group.
Enter the group name and other initial details to identify the group, explain its purpose, and establish its initial appearance.
Group Name: The name members use to identify the group.
Group URL (Group slug): The web address for the group.
Group Description: A short explanation of the group and what members can expect.
Privacy: Choose whether the group is public or private.
Moderators: Assign moderators during group creation.
Brand Color: The color used in the group design.
Favicon: The small icon shown in the browser tab.
Cover Image: The main image at the top of the group page.
Logo: The group logo, including in the group switcher.
The person who starts the group setup becomes the group owner and receives administrative responsibilities and privileges.
When you finish inputting the information on this initial page, select Save to create the group.
Customize community branding and domain
Once you are inside the new community, you can apply your branding to make the community feel like home to your members.
Apply branding
Community branding supports a favicon, cover image, logo, and visual layout. Upload these assets in the branding settings so the community has a consistent appearance for members.
Configure community email notifications
Customize the event reminder email from the community email settings when members need a branded reminder before a community event.
Open Sites > Client Portal > Memberships > Settings > Email Settings > Communities > Event Reminder Email.
Open Default Template and select Edit.
Update the Subject and Body.
Select Preview to review the message.
Select Save.
Community email uses the default email address selected in Email services under Subaccount Settings.
Manage members and roles
Use the Members tab to invite people and give administrative privileges, then manage existing member roles from the group.
Open the community’s Members tab.
Select Invite Members.
Turn on Give Administrative Privileges when the invited member needs administrative access.
Owners and admins can change a member’s role from the People tab while logged in to the group.
Open the group and go to the People tab.
Search or filter to find the member.
Select the three-dots icon on the member’s profile row.
Select the role or access level to assign.
JourneyCARE groups use four roles: Owner, Admin, Moderator, and Contributor.
Role | Create posts | Moderate posts | Manage members |
|---|---|---|---|
Owner | Yes | Yes | Yes |
Admin | Yes | Yes | Yes |
Moderator | Yes | Yes | No |
Contributor | Yes | No | No |
Owner: Has full administrative control.
Admin: Can add or remove members and assign administrative privileges.
Moderator: Can moderate content.
Contributor: Can post discussions, comment, and like content.
Control group visibility
Change a group between Public and Private from Group Settings > Details.
Open the group and its settings.
Open Details.
Select Public or Private.
Save the change.
Public groups allow people to join immediately without manual approval. Private groups restrict posts and member visibility to members, and join attempts require manual review, including requests made through an invite link.
Review private-group requests from Members > Requested, then approve or decline the request.
Organize discussions with groups and channels
Use groups to separate member participation by topic, then use channels inside each group to organize discussions.
Open Groups and select Create Group to add another focused member space.
In the group interface, select + Add Channel to create a discussion channel.
Members can participate in posts, comments, likes, and replies within the available channels. Admins and moderators can delete posts in the group, while members can delete their own posts and comments.
Add learning content to a group
Link an existing course to a group from the Learning tab when members should access course content inside the community.
Open the group’s Learning tab.
Select + Add Course.
Choose an existing course.
Choose the course visibility: all members, selected levels, Buy Now, or time- or milestone-based unlock.
Courses linked to a group display inside that group and do not affect the main course catalog.
Create community events
Create an event inside a group from the Events tab when members need event details and a meeting link in the community.
Open the group’s Events tab.
Select Create Event.
Enter the event title, description, image, and meeting link.
Choose a one-time event or a recurring event that repeats weekly or monthly.
Create the event.
Use gamification and rewards
Use Leaderboard and Gamification & Rewards to support levels and rewards for community participation.
Members earn points from posts, comments, and likes. Automations can also assign points.
Use tagging and featured posts
Tag members in posts, comments, and comment replies by typing @ followed by part of the member’s name, then selecting the member from the suggestions.
The selected member appears as a highlighted tag and receives an email notification with a direct link to the post or comment. You can tag multiple members in a single post or comment.
Feature an important post by opening its three-dots menu and selecting Pin. A featured post appears at the top of its channel and on the home timeline; select Unpin to return it to its original location.
Communities FAQs
Can I change a group’s slug?
Can I use a separate domain for a community?
The community uses a separate domain from the organization’s main website. You can link between the website and the community.
What happens when I delete a community?
Community deletion is irreversible. The community’s content, members, and discussions are permanently removed.
How are reward levels determined?
Levels are based on points earned through participation such as posts, comments, and likes. Automations can also assign points.
Was this helpful?
Was this helpful?