Contacts

TRANSCRIPT: It's easy to import contacts into JourneyCARE. In this video, I'll walk you through exactly how it's done. A few quick things to know before you start. First, your file must be in CSV format and must be under 30 megabytes in size. If it's larger, you'll need to split it into separate files. Also, all of your data needs to be on just one sheet or tab And you should have just one contact per row. You'll also want to consider whether your spreadsheet contains any new fields that don't already exist in your database. If you do have new fields, go ahead and create those fields in JourneyCARE before you try to import, click on settings at the bottom of the left navigation. Then when you're on the settings page, choose custom fields. Custom fields are covered in another video, so I won't go into detail on how to create those here. After you get any new custom fields created, go back to the contacts page and we can start the import. Click the icon at the top of the list view that looks like an inbox with the arrow going down. Make sure that the contacts option is selected for the type of import you want to do. Then click next to continue. In the middle of the screen, you'll see a small cloud icon. Click there. To initiate the upload, you'll select the CSV file from your computer. Note that when you're trying to find the file on your computer, you will only see CSV files because that is the only type that will upload. So if your file isn't being displayed, double check that it is in the correct format. Immediately below the upload set what you're wanting to do with the file. By default JourneyCARE matches on contact id, email address, and phone number. So if any of these items are in your CSV file, the system is able to update an existing record or determine that a new one needs to be created. This helps you avoid creating duplicate records. Click next to continue on on the screen that appears, you'll be shown all of the columns that appear in your CSV and you can match those to the fields in your database. Simply click each dropdown and choose where you want the data to go. If you want to ignore any columns on your spreadsheet, simply do not match that column to a field. Be sure to click the small box at the bottom that says to ignore data in unmatched columns. Then click next. On the final screen that appears, you will confirm that your columns are matched correctly. There are also options at the top of the page where you can choose to automatically apply a tag to the imported contacts, run a specific automation for the imported contacts, or create a saved smart list for the imported contacts. If any of these options are applicable, just check the box and then choose what you want from the related dropdown. If everything looks good, click the compliance box at the bottom of the screen that indicates that these contacts have agreed to hear from you. Then the start bulk import button at the bottom right will be clickable. Your import should begin in just a few moments. If you have any trouble, let us know. Here at the help desk, we're always happy to assist.
TRANSCRIPT: Often when sending an email, we want to add details from the contacts record into the message in the email composer. You can use placeholder variables where you'd like to insert these fields. Start in the email where you want to add the details. In this example, we're updating an internal notification that is sent via email. This example is a plain text message, but you follow the same process even if you're using a pretty email template. Click on the email in the spot where you want to insert the field. Then click the icon that looks like a tag. A dropdown list of things that you can insert will appear. If it's a field from the contact's record that you'd like to use, click on contact. All of the available fields will show. Note that you can type the field that you're looking for into the search button at the top to quickly find it. Click on the one that you want to select it. That will automatically insert the placeholder variable into the email. Be sure to click save on the email panel and also save at the top of the workflow. If you have any trouble, drop us a line and our help desk team will be happy to assist.

TRANSCRIPT: By default, there are certain columns that always show when you create a smart list in JourneyCARE, but these can be changed. Get started by clicking into the contacts area. Then click on the smart list you want to change. In this example, we're going to add the full address field to show on our members Smart list, so we will click on the list labeled members. Next, click columns. A panel will appear that shows every field in your database in alphabetical order. A blue check indicates that the field is showing as a column. Simply uncheck any boxes that you don't need as columns and check the ones that you do want to show. The change is made right away and you should see the columns you've selected. If you just needed to see this information temporarily, there's nothing else you need to do. The columns will go back to the original settings when you leave this page. However, if you want to save these columns so that the smart list always shows the information you've selected, click on more filters at the top right to pop out the panel that shows the smart list details. There is a save button at the bottom of the panel. Click that and your new column selections will be permanent. If you run into any trouble with your column selections, don't hesitate to drop us a line at the help desk. We're here to help.

TRANSCRIPT: It's easy to export contacts from Journey Care whenever you wish. An export will provide you with a CSV file, which is a common format used by software platforms and can be opened in Excel. You'll want to get started in the contacts list view. Be sure you are on the all tabs so that you are picking up all of your contacts without any filtering. Click columns to view all of the possible data that you can export. Check the boxes for any columns you wish to export. In this example, we'll check the box for 2021. Session choices. A checked box means you want to include that field in the export. If you do not check the box, the field will not be included in the export. Continue checking boxes for any fields you want to include. If you want to export all contact fields, check all of the boxes down the list. Next, check the box that appears above the list of contacts to select all ae. Note that only the first 20 contacts are selected. If you have more than 20 contacts, there will be an option to select all Click the export icon above the list S box will pop up confirming that you are exporting a set of contacts. Click the button that says Export Contacts. After you click this button, an export file will be immediately downloaded. If you run into any trouble with your export, let us know. Our team is here to help.

TRANSCRIPT: Smart lists are a great way to save segments of your database for easy access. Each list is dynamic, so whenever you look at one, you'll see the people from the database who meet the specific filters used by that smart list. To get started with a smart list, be sure you are on the all tab so that you are filtering from the full range of all contacts. Then click more filters in the right hand column. Filters are how you are going to narrow down who specifically you'd like to have on this list. Search for the first filter you'd like to use. Every field in your database is available to use as a filter. You'll also find lots of other criteria that can be helpful. As you begin typing in the filter that you're looking for, you'll start seeing options appear. For this example, let's filter on state to try to find all contacts that are in the state of New York. Type in the criteria you want. In this case, we'll type NY for New York. Then click apply to apply the filter. If you want to apply a second filter, you'll choose to connect them by and or by or if you choose. And keep in mind that both filters must be true in order for the contact to be selected. If you choose, or the contact will show if either of the filters are true. In this case, I use the two digit abbreviation for the state in my first filter, but I also wanna pick up people who have the state spelled out as New York. So I'm going to choose dot Orient. I will simply repeat the process of adding the state filter. This time I'll input New York all spelled out, and then I will click apply to add this second filter when I'm satisfied that I've found everyone, I'll click Save as Smart List at the bottom of the panel. Give the Smart list a recognizable name and click save. Once you've done this, your smart list will be available to use. Sometimes filters can be a little tricky to figure out at first. So if you're having any trouble, just reach out. Our help desk team will be happy to assist.

TRANSCRIPT: Smart lists can be used in so many ways in your journey Care account. If you have an existing list, you may be wondering, how do I get someone else onto this list? This is actually quite easy to do because a smart list is always picking up the current people in the database who meet the specified criteria. So to put someone new on the list, you simply have to make sure that they meet the criteria. For example, if you have a smart list of board members that is created by having the tag board, all you would have to do to add someone new to the list is to add the board tag to their contact record. If you want to remove someone from the list, simply remove the board tag. Here is another example. In this case, there are three filters that must be met. For someone to appear on the list, their address cannot be empty. They must be tagged either active 2024 or active 2025, and they cannot be tagged deceased. If any of those criteria are not true, the person won't appear on the smart list. If someone is not included on a smart list and you think they should be, then you need to look at the specific criteria that your list is filtering for and check the contact to make sure that they have what is required. Sometimes it can just a small thing that is off, but if the person doesn't meet the filtered criteria, they won't be on the list. I hope that quick explanation is helpful. If you need more help creating a smart list or troubleshooting why someone doesn't appear, just reach out. Our help team is happy to assist.

It's easy to add additional administrators to your JourneyCARE account with full control over their permissions.
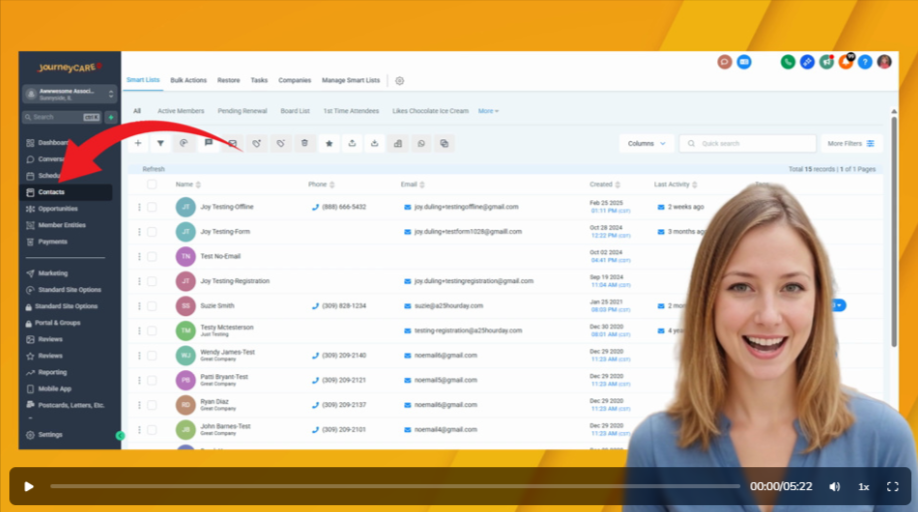
JayCee, your virtual guide from JourneyCARE, walks you through what you'll find on the Contact List View.

How to Add Someone to a Smart List How to Access & Share a Saved Smart List How to Create a Smart List of People who have Tag A -or- Tag B How to Create a Smart List for People who are tagged with Tag A -and- Tag B